The following is not electrical advice. Please contact a qualified electrician if you have questions!


People often ask what the difference is between SPT1 and SPT2 wire. The main differences would be the thickness of the wire/insulation and the amount of amperage it can handle.

Generally speaking, SPT1 wire can handle 7amps, while SPT2 can handle 10amps. The thickness of the insulation will come into play as well for weather related purposes.

You can, but it requires some help. You need to use the LOR iDMX1000 in order to run DMX from the Showtime Director. Why? The iDMX takes the LOR signal and turns it into DMX signals. Prior to the LOR software being able to support DMX adapters, this was required for computer run shows as well.


You have a G3 board.

LOR was going to call the new controllers Gen2. However, the software was at S3 so they thought it would be good to get things in sync and have G3 controllers and S3 software.

Unfortunately the silkscreen on the green cards reads the original name for the card “CTB16PCG2” because of an oversight.

To quote LightORamaJohn in a post he made on the forums.

The board you are talking about is a g3 controller. These CTB16PC boards are marked “CTB16PCG2 – V4” which refers to the circuit board rev level. The main differences from the previous generation are faster processors, higher current accessory power supplies, ghost loads and much better zero cross detection — obviously we also moved to surface mount technology to keep the price stable. Additionally, the firmware has been upgraded to support LED curves. We decided to call these g3 since there have been a few generations of the original PC controllers. We should have changed the silk-screening to avoid confusion. Sorry about that. The picture attached is a g3 CTB16PC.

The Light-O-Rama environment has many parts that need to work together or else you do not have any control of your display. This LOR Troubleshooting Guide is intended to help you methodically track down where the problem might be, and how you can resolve the issue.

COM Port Issues

The LOR Software has to be able to talk to the controllers somehow. To do so, LOR uses a USB adapter that converts the lighting commands into the RS485 protocol. These USB adapters (connectors) use the COM ports on your computers. While this is somewhat technical in nature, just know that one function of a COM port is communication.

Like every other piece of hardware or software to attach or install to your computer, it need a driver in order to work correctly. If you have never installed the drivers for your USB adapters, then you should do so right now. You can download the drivers here.

Troubleshooting COM Port Issues

Windows Device Manager

The easiest way to troubleshoot a COM port issue is to use a single controller, connect it to the USB adapter, and see if you can talk to it via the LOR Hardware Utility.

Before you do that you should open the Windows Device Manager, and with your USB Adapter connected make sure that you see something similar to the image. You should have “USB Serial Port (COM#) where # equals a number. If it doesn’t say that, then go back and re-install the USB drivers.

Notice in the example here it says “COM4”? This will come in handy when we get to the Hardware Utility. You will want to make sure that you have COM4 selected on the left hand side of the HWU.

For more help on troubleshooting COM port errors, please see our Clear COM Port Errors page.

Ready to get started with S3? Want more help? Take a look at these video tutorials from Light-O-Rama.


Looking for more help getting started with the new S3 program? Bob, who works at Light-O-Rama posted the following content in the forums.

The contents of the post, as of 10/18/2011 are posted below. You might want to check the post to see if it has been updated.

  • Background Effects: Shows basic use of Background Effects mode, including demonstrating that using the “Off” tool with Background Effects doesn’t seem to do anything.
  • Beat Wizard: A demo of the basic use of the Beat Wizard.
  • Channel Button Colors #1: Shows the effects of the various View / Channel Button Colors settings.
  • Channel Button Colors #2: A bit more about View / Channel Button Colors, but specifically with its “Cell” setting.
  • Channel Group Effects: Shows how effect tools (such as the Fade Up tool) behave when applied to channel groups in different ways.
  • Chase: Basic use of the Chase tool.
  • Chase Fill: Shows a potentially confusing way in which the Fill tool behaves, both inside and outside of channel groups.
  • Copy and Paste: Shows a basic copy and paste between two sequences.
  • Copy via Group: A little trick to quickly copy a bunch of contiguous channels from one track to another.
  • Delete Group: A trick to quickly delete a bunch of contiguous channels.
  • Drag and Drop into Group: Shows how to move channels into a group by dragging and dropping.
  • Drag and Drop within Group: Shows how to move channels within a group by dragging and dropping, and also a trick to create a group that contains only certain channels (such as your red channels).
  • Force to On or Off via Subsequences: A trick to force a channel, or a bunch of channels, to only have “on” or “off” effects (e.g. no fades or twinkles).  Warning! This trick is not guaranteed to work in future releases of the software… it’s really more of an unintended side effect rather than a feature.
  • Group but Leave in Place: Shows how to take advantage of the Channel Grouping dialog’s “Leave copies” option in order to make multiple channel groups listing different channels in different ways.
  • Group Parts: Shows how to make multiple channel groups that list the same channels in different ways.
  • Mirror: Uses the Chase tool to produce a simple mirror image effect.
  • Moving Tracks and Channels: The difference between the terms “track” and “channel”, and how to move each of them.
  • Multiple Clipboards: How to use more than one clipboard to copy and paste different things.
  • Random Fades: A trick to make random fades in your sequence.
  • Simulated Dual Shimmer: Using Foreground Effects, Background Effects, and the Custom tool to make a sort of interlaced fading up-and-down shimmering effect.
  • Simulated RGB Twinkle #1: Using the Toggle tool to simulate a twinkle on a set of RGB channels.
  • Simulated RGB Twinkle #2: Building on “Simulated RGB Twinkle #2” to make a simulated twinkle with color on a set of RGB channels.
  • What’s New in LOR 3: Warning! This one is over half an hour long.  And it doesn’t even show everything that’s new in LOR 3!


When working with the Light-O-Rama system, it is very important to use a common ‘language’ when discussion various aspects of the software. For example, “Control Panel” is a term used to define part of the LOR Software. However, it’s also used in the Windows world. This article is an attempt to define the terms within the scope of the LOR software and hardware environment.

Control Panel

A program that can be used to manage the Light-O-Rama system on your PC. The Control Panel runs in the system tray (where the clock runs). Its icon is the Light-O-Rama light bulb. The software is made up of a number of programs. The Control Panel is a convenient way of accessing those programs. The Control Panel must be running to enable shows.

Daisy Chain

The manner in which Light-O-Rama light controllers are connected. A wire goes from the show source (the PC, a Director Unit or an MP3 Player) to a Companion Unit. Another wire goes from the Companion unit to the next Companion Unit, etc. The units are “ chained” together. Do not put “Y”s or forks in the data cable. Only connect the units in a Daisy Chain configuration.

Data Cable

Light-O-Rama considers a cable a Data Cable if the wires are connected straight through. Light-O-Rama can use both Data Cable and Phone Cable BUT you must know which type of cable it is.

Most likely, the only cable that you will see that is NOT Data Cable is a wire that is intended specifically for phones. If you go to the local Hardware Store and purchase a phone extension cable then that wire it is NOT a Data Cable The distinction between Data Cable and Phone Cable is important because the wires are swapped in a phone cable. There are selectors, jumpers or jacks on most Light-O-Rama controllers that allow you to choose the correct wire type.

Only the wire coming into a controller (from the previous controller or show source) is used to determine the selector settings. The wire leaving a controller (if there is one) can be of any type and has no bearing on the cable selection. For example: If you have a Phone Cable in and a Data Cable out then set the Unit for Phone Cable.

Director Unit

A controller that controls other controllers. When controllers are not connected to a PC or MP3 Player, a Director Unit (controller) is required to run the display. Standalone sequences may contain commands for a number of different controllers. A controller running in standalone mode transmits commands that do not belong to it. Controllers connected to this unit receive these commands and are called Companion Units. There is no difference in the hardware of aDirector Unit and a Companion Unit. The difference is the mode that they are in. The PC is in reality a Director Unit. There can be ONE AND ONLY ONE Director Unit on a Daisy Chained group of controllers.

Hardware Utility

This is a program that is used to setup and test the hardware used to control lights.

Schedule

The schedule is a list of shows and times when those shows should be played. The Schedule Editor program is used to create and update Schedules. If Enable Shows is set on the Light-O-Rama Control Panel then the schedule will be monitored and shows started and stopped at the proper time.

Schedule Editor

The program that is used to schedule when your Shows should run.

Sequence

A file that contains a sequence of instructions that will be sent to lighting controllers. The sequence is created and updated using the Sequence Editor program. There are two types of Sequences, Animation Sequences and Musical Sequences. An Animation Sequence is used to animate a holiday display or sign. A Musical Sequence has a music file associated with it that is played with the sequence as it runs.
 

Protected Sequence

A protected sequence is was introduced in Light-O-Rama version 3.0. A protected sequence can be played only with LOR software after version 3.0. With very few exceptions the contents of a protected sequence can not be changed.

Encrypted Sequence

An encrypted sequence is one that was created with a demo version if the Light-O-Rama software. If you create a sequence with the demo version of Light-O-Rama and you wish to remove the encryption you will need to do two things. 1) Purchase the Light-O-Rama software. 2) Open and save the software on the same computer used to create the sequence.
 

Sequence Editor

The program that is used to create and modify the Sequence files that define how the lights should be controlled.

Show

A show is a file that contains a number of Sequences and the order in which they should be played. Shows are created using the Show Editor program.

Depending on the version of the LOR Software that you are running various tabs/sections are available for use. In the Advanced version you have:

  • Background
  • Startup
  • Animation
  • Musical
  • Interactive
  • Shutdown

Let’s say you create a show, and call it “Show 01.” Within this show, any or all of the tabs/sections can be filled in. In other words, they could all be used for that “show.”

Show Editor

The program that is used to arrange your Sequences into Shows.

Standalone

A Light-O-Rama unit can be passive and therefore controlled by another entity or it can be active and control itself and/or other controller(s). An Animation Sequence created using the Sequence Editor can be downloaded into a controller using the Hardware Utility program. The controller can be setup to run this sequence whenever it has power or if the controller is a model with an internal clock, it can be instructed to run the sequence during a particular time.

Tracks

Tracks are groups of channels. A channel can be in one track, or can be shared among multiple tracks. All sequences are initially created with a single track.

Unit

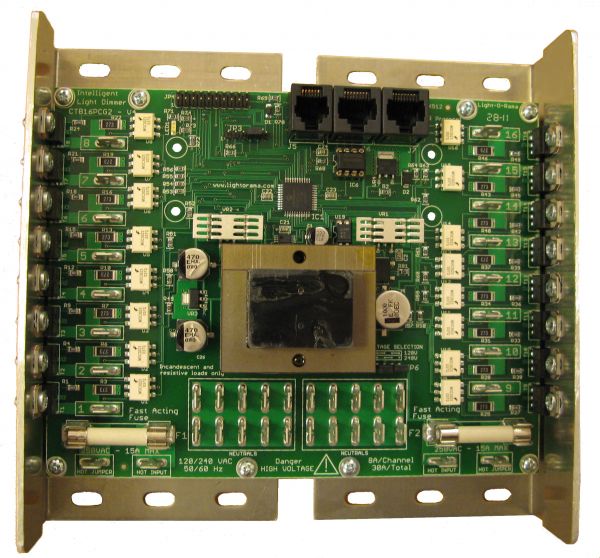
A Light-O-Rama light controller. Each Unit (controller) has a number of channels or controllable circuits.

Unit Id

Each controller has a unique identifier assigned to it. When a message is sent by a Director Unit, all the controllers daisy chained together see the message. A Unit Id is specifies the controller that a message is intended for. Controllers only act on messages that contain their Unit Id. The Unit Id is a two-character field. Each character can have the values 0,1,2,3,4,5,6,7,8,9,A,B,C,D,E and F. The Ids can therefore have the values of “00” to “FF” however some values are not allowed. “00” and “F1” thru “FF” are not allowed.